
Lazy Lighter documentation
Installation
Installing the Addon
The installation process is the same across all operating systems:
- Download the addon ZIP file from your order page.
- Open Blender and navigate to Edit › Preferences › Add-ons.
- Click the Install button in the top-right corner.
- Select the downloaded ZIP file and click Install Add-on.
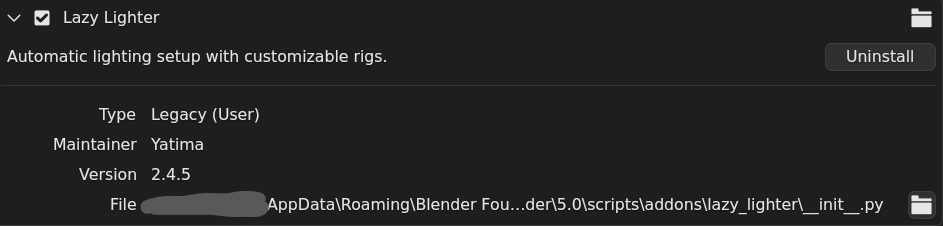
- Enable the addon by checking the box next to "Lazy Lighter".
- The addon panel will appear in the 3D Viewport sidebar (press N) under the "Lazy Lighter" tab.

Quick Start
This guide will get your first lighting rig running in under 30 seconds. We'll create a classic Three-Point lighting setup:
- Select your object. The subject you want to light (character, product, etc.)
- Ensure you have a camera in your scene. All lighting is positioned relative to the active camera.
- Open the Lazy Lighter panel by pressing N in the 3D Viewport and selecting the "Lazy Lighter" tab.
- Choose "Three-Point" from the Rig Type dropdown menu.
- Select your camera in the Camera Reference field (or click "Use Active Camera").
- Click "Create Rig".
- Adjust if needed using Distance Scale, Height Offset, or Horizontal Rotation sliders.
Your object is now lit with a Three-Point setup: a Key Light providing main illumination from the side, a Fill Light softening shadows from the opposite angle, and a Rim Light creating edge definition from behind. All lights are pre-positioned at cinematically correct angles.
Important: These rigs are professionally-tuned starting points, not plug-and-play solutions. Every scene is unique. Use the simplified controls (global intensity, size, individual light adjustments) to refine the lighting for your specific subject, composition, and artistic vision. There's intentional room for artistic movement. That's where your creativity comes in.
Interface Reference
The Lazy Lighter panel is located in the 3D Viewport sidebar (press N) under the "Lazy Lighter" tab. This section explains each control in detail.
Rig Creation Section
Rig Type

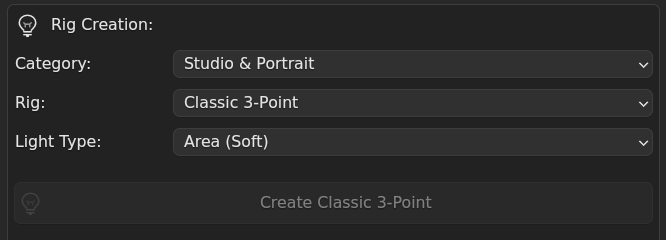
- Studio & Portrait: Classic 3-Point, Rembrandt Portrait, Butterfly/Paramount, Loop, Studio Softbox, Clamshell Lighting, Product Rig Light, Wes Anderson, Halo, Anamorphic.
- Natural & Environmental: Outdoor Sun, Golden Hour, Interior Natural, Overcast, Desert, Moonlight, Electric Storm, Artic, Sakura.
- Cinematic & Dramatic: Film Noir, Horror, Split Lighting, Dramatic Rim, Practical+Ambient, Firelight, Concert Lighting, Inferno, Crescent, Baroque, Carnival, Gothic Cathedral, Kabuki, Triadic Color Harmony, Teal & Orange, Blade Runner, Circus, Cross-Light, Interrogation.
- Professional & Commercial: Broadcast, Green Screen, Car Showroom, Sitcom, Art Gallery, Architectural.
- Stylized & Experimental: Stellar, Vortex, Void.
- Themed & Special FX: Cyberpunk, Underwater, Bioluminiscence.
Each rig comes in three variations: Area Lights (softer), Spot Lights (focused), and Point Lights (omni).
Camera Reference
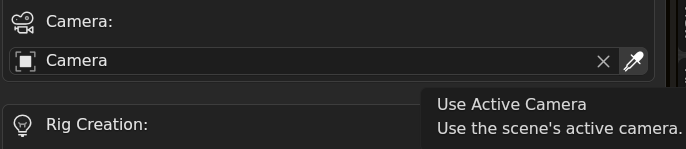
Select which camera the lighting rig will be positioned relative to. All lighting setups are camera-dependent. What looks like a Three-Point from one angle might look completely different from another. The "Use Active Camera" button provides quick selection of the scene's currently active camera.

Light Type
Choose the default light type for all lights in the rig:
- Area (default): Soft, realistic lighting with natural falloff. Best for most scenarios.
- Spot: Focused beam with controllable cone angle. Theatrical, spotlight effects.
- Point: Omnidirectional light radiating in all directions. Simulates bulbs, candles.
You can change individual light types after creation using per-light controls.


Create Rig Button
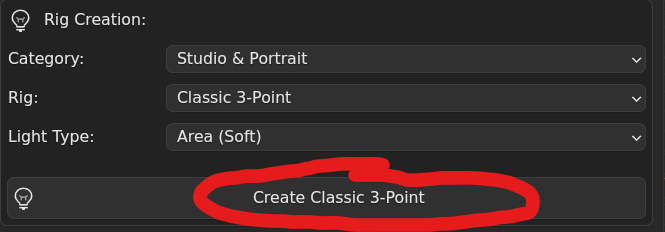
Creates the selected lighting rig at your target object's location, positioned relative to the chosen camera. If a Lazy Lighter rig already exists in the scene, it will be automatically deleted and replaced with the new rig.

Important: The rig is positioned at the geometric center of the bounding box, not at the object's origin point (gizmo location). This ensures consistent positioning regardless of where the artist placed the origin. For multiple objects, the center is calculated from the combined bounding box of all selected objects.
Global Rig Controls
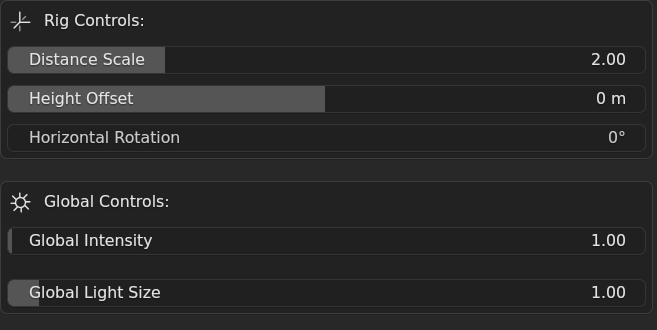
These controls appear after rig creation and affect the entire lighting setup simultaneously.

Distance Scale
Moves all lights closer or farther from the subject along their current directions. Range: 0.5 (very close, dramatic) to 10.0 (very far, subtle). Default: 2.0.
Closer lights create harder shadows and more dramatic falloff. Farther lights produce softer, more even illumination. This is one of the most powerful controls for adjusting the "mood" of your lighting.
Height Offset
Raises or lowers the entire rig vertically. Range: -5.0 (below subject) to +5.0 (above subject). Default: 0.0.
Negative values create upward lighting (horror, dramatic). Positive values create downward lighting (natural, beauty). Use this to simulate different times of day or create specific moods.
Horizontal Rotation
Rotates the entire lighting rig around the subject horizontally. Range: -180° to +180°. Default: 0°.
Allows you to reorient the lighting setup without manually moving individual lights.
Global Intensity
Multiplies the intensity of all lights proportionally. Range: 0.0 (off) to 100.0. Default: 1.0 (100%).
Brightens or dims the entire setup while maintaining the carefully balanced ratios between lights. Use this for overall brightness adjustments before fine-tuning individual lights.
Note: Lights with Intensity Override enabled ignore this global control, giving you precise per-light control when needed.
Global Light Size
Multiplies the size of all area lights proportionally. Range: 0.1 (very small, hard shadows) to 10.0 (very large, soft shadows). Default: 1.0.
Larger lights produce softer shadows and more gradual falloff. Smaller lights create harder, more defined shadows. This is your primary control for adjusting shadow quality across the entire rig.
Note: Only affects Area lights. Spot, Point, and Sun lights have no size property. Lights with Size Override enabled ignore this global control.
Individual Light Controls
Each light in the rig can be individually controlled by expanding its section in the panel. These controls provide granular adjustment for fine-tuning your lighting.

Light Type Override
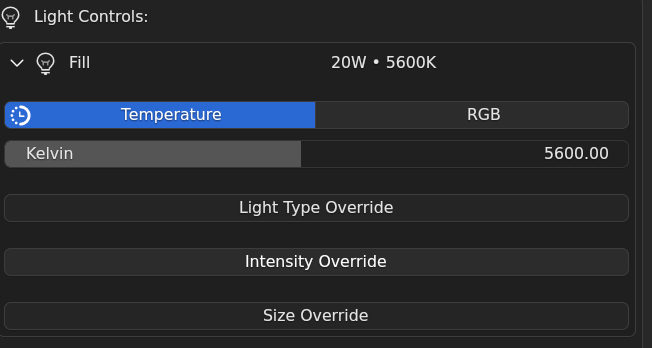
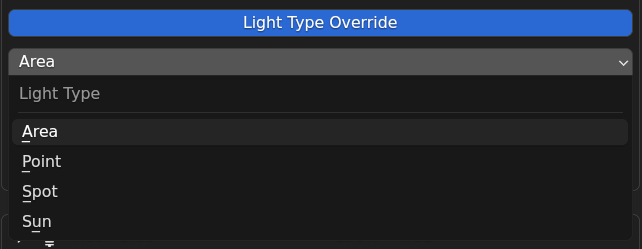
Toggle to enable Light Type Override, which allows you to change this specific light's type independently from the global light type setting. Available types:
- Area: Soft shadows with adjustable size.
- Point: Omnidirectional light radiating in all directions.
- Spot: Focused beam with cone angle control.
- Sun: Parallel directional rays (ignores position/distance - use for ambient only).
Allows mixing light types within a single rig for creative effects (e.g., hard Spot Key Light with soft Area Fill).

Warning: Sun lights ignore position and distance. They emit parallel rays in one direction regardless of where they're placed. Only use Sun type for directional ambient lighting effects.
Color Controls
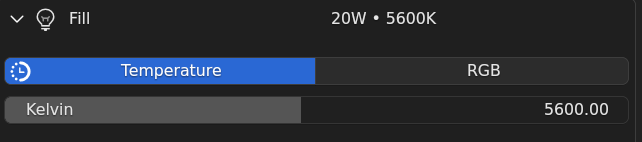
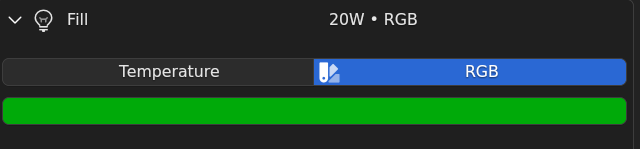
Two color modes available via toggle:
Temperature Mode (Kelvin)
Industry-standard color temperature scale. Range: 1000K (warm candlelight) to 12000K (cool blue sky).
Common values:
- 1800K-2000K: Firelight, candlelight (very warm orange).
- 2700K-3200K: Tungsten studio lights, household bulbs (warm).
- 5000K-5600K: Daylight, neutral (professional standard).
- 6500K-7000K: Overcast sky (slightly cool).
- 7000K-8000K: Moonlight (cool blue).
- 9000K-12000K: Deep blue, sci-fi effects.

RGB Mode
Full RGB color picker for creative/stylized lighting. Enables any color imaginable: neon pinks, saturated cyans, etc. Use for Cyberpunk rigs, concert lighting, or artistic effects.

Intensity Override
Collapsible section. When enabled, this light ignores Global Intensity and uses the exact wattage value you specify.
Use when you need precise control over a specific light's brightness without affecting the rest of the rig. Essential for creating intentional imbalances or matching real-world reference photography.


Size Override
Collapsible section. When enabled, this light ignores Global Light Size and uses the exact size value you specify.
Use when you want one light to be harder/softer than the rest. Common scenario: hard Key Light (small size) with soft Fill and Rim (large sizes).


Creative Randomizer
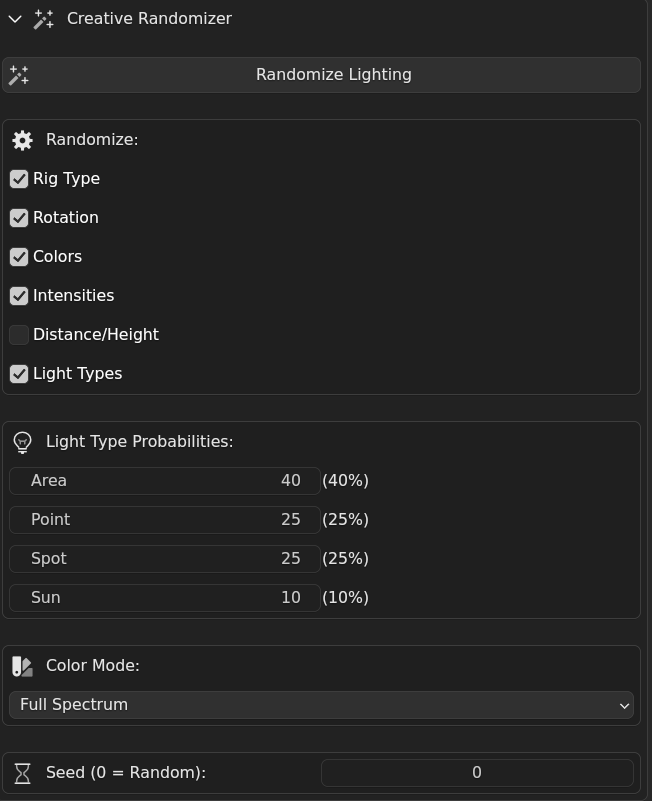
Experimental feature for quick lighting exploration. Generates random lighting setups with controlled parameters to ensure usable results.

Randomization Options
- Rig Type: Randomly selects from all 50 rigs.
- Rotation: Random horizontal rotation (0-360°).
- Colors: HSV-based color randomization in four modes (Full Spectrum, Warm Tones, Cool Tones, Neon/Saturated).
- Intensities: Random intensity multipliers (0.3x - 3.0x per light).
- Distance/Height: Random Distance Scale (1.0-4.0) and Height Offset (-1.0 to 1.0).
- Light Types: Randomizes each light's type independently using weighted probabilities.
Light Type Randomization
When Light Types randomization is enabled, you can control the probability of each light type appearing using a weight-based system. Each light in the rig is randomly assigned a type based on your specified weights.
How Weight-Based Probabilities Work
You set a weight (0-100) for each light type. The system automatically normalizes these weights to calculate actual probabilities:
- Area Weight: Default 40 (40% probability).
- Point Weight: Default 25 (25% probability).
- Spot Weight: Default 25 (25% probability).
- Sun Weight: Default 10 (10% probability).
The UI displays both the weight value and the calculated percentage in real-time (e.g., "Area: 40 (40%)").
Examples:
- Default (40/25/25/10): 40% Area, 25% Point, 25% Spot, 10% Sun.
- No Sun (40/30/30/0): Normalizes to 40% Area, 30% Point, 30% Spot, 0% Sun.
- All Area (100/0/0/0): Every light becomes Area.
- Favor Area (80/10/10/0): 80% Area, 10% Point, 10% Spot.
Note: Each light is randomized independently. Setting weights to 40/25/25/10 doesn't mean you'll get exactly 40% Area lights, it means each individual light has a 40% chance of being Area. The actual distribution will vary randomly.
Seed System
Optional seed input for reproducible randomization. Enter 0 to use current time (different every click), or any specific number to generate the same "random" result repeatedly.
Preset System
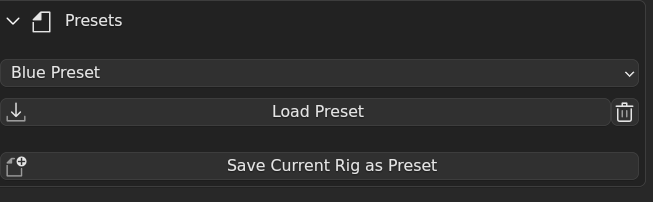
Save and load your customized lighting configurations for reuse across projects.

Save Preset
Enter a name and click "Save Preset" to store the current rig's complete configuration: rig type, global controls (intensity, size, rotation, distance, height), and all individual light overrides (colors, intensity, size, type, visibility).
Presets are stored as JSON files in Blender's user scripts directory:
- Windows:
%APPDATA%\Blender Foundation\Blender\{version}\scripts\lazy_lighter_presets\ - Linux:
~/.config/blender/{version}/scripts/lazy_lighter_presets/ - macOS:
~/Library/Application Support/Blender/{version}/scripts/lazy_lighter_presets/
Load Preset
Select a saved preset from the dropdown and click "Load Preset" to instantly apply that lighting setup. Deletes any existing rig first, just like manual rig creation.
Delete Preset
Permanently removes the selected preset from your library.
Delete Rig
Removes the current Lazy Lighter rig from the scene. Supports undo. The rig is automatically deleted when creating a new one, so this button is primarily for cleanup when you're done lighting.
Warning: Delete Rig removes the rig from the scene, but the lights that were created still exist in the .blend file as unused data. It is good practice, especially after creating multiple rigs in the same scene, to clean this data via File -> Clean Up -> Purge Unused Data…
Rig Categories Guide
Understanding the six categories helps you choose the right rig for your scene. Each category represents a distinct lighting philosophy and use case.
Studio & Portrait
Controlled, flattering lighting for character work, beauty shots, and professional portraiture. Based on techniques from fashion photography and studio cinematography.
Key characteristics: Neutral color temperatures (5000K-5600K), balanced ratios, designed to minimize unflattering shadows while maintaining dimensionality.
Use when: Lighting characters, portraits, beauty renders, product photography where you need clean, professional results.
Natural & Environmental
Realistic outdoor and natural lighting scenarios. Simulates sun, sky, weather conditions, and environmental light sources.
Key characteristics: Physically accurate color temperatures, strong directional components, natural ratios between key and fill.
Use when: Outdoor scenes, architectural visualization, establishing shots, daytime/nighttime environments.
Cinematic & Dramatic
Narrative storytelling lighting with strong mood and emotional impact. Inspired by film noir, classic cinema, and modern cinematography.
Key characteristics: High contrast ratios, motivated lighting, intentional shadows, strong directional sources.
Use when: Character drama, storytelling moments, psychological scenes, creating mood and atmosphere.
Professional & Commercial
Polished lighting for product visualization, broadcast, and commercial work. Designed to showcase subjects clearly and professionally.
Key characteristics: Even illumination, controlled shadows, optimized for technical requirements (green screen, architectural detail, etc.).
Use when: Product renders, broadcast graphics, architectural presentations, commercial visualization.
Stylized & Experimental
Unconventional creative setups that push boundaries. For artists who want to break rules and create unique looks.
Key characteristics: Unusual angles, unexpected colors, non-standard ratios, experimental configurations.
Use when: Creative projects, music videos, experimental art, sci-fi/fantasy scenes where realism isn't the goal.
Themed & Special FX
Genre-specific and effects-driven lighting. Specialized rigs for horror, underwater, firelight, and other specific scenarios.
Key characteristics: Motivated by specific light sources (fire, water caustics, electric sparks), often uses colored gels or extreme temperatures.
Use when: Genre films, special effects shots, themed scenes where a specific "look" is required.
Workflow Tips
Starting from Scratch
- Choose your rig category based on the scene type (portrait, outdoor, cinematic, etc.)
- Pick a specific rig that matches your lighting intent.
- Create with default settings to see the baseline setup.
- Adjust Distance Scale first - this has the biggest impact on mood.
- Fine-tune with global controls (intensity, size, rotation, height).
- Refine individual lights last - adjust colors, use overrides for specific effects.
- Save as preset if you want to reuse this configuration.
Working with Multiple Objects
Lazy Lighter supports multi-object selection. Select all objects you want to light, then create the rig. For multiple objects, the center is calculated from the combined bounding box of all selected objects.
Useful for: Lighting multiple characters in a scene, product arrays, architectural elements.
Warning: Although Lazy Lighter can theoretically work with objects of arbitrary size, it is specifically designed to light characters, products, and other objects within that size range. Think of it this way: on a film shoot, it would not make sense to light an entire building using a three-point setup, even though with Lazy Lighter and the right settings you could do it. However, if you select several objects with very different scales (a character and a building), it will be very difficult for the rig to work correctly. Perhaps with a rig that uses Sun-type lights, but that already falls within your own experimentation.
Camera-Relative Positioning
All rigs are positioned relative to your active camera. This means:
- The same rig type looks different from different camera angles.
- If you change your camera position, you may need to recreate the rig (which is simple: you move the camera and press the Create Rig button again).
- Professional cinematography principle: lighting is camera-dependent.
This is intentional and matches professional workflow. In film production, you re-light for every camera setup.
Rig Positioning and Bounding Box Center
Lazy Lighter positions rigs at the geometric center of the object's bounding box, not at the object's origin point (the gizmo location). This ensures consistent and predictable lighting regardless of where the origin was placed during modeling.
Why Bounding Box Center?
- Consistency: Objects with off-center origins still get properly centered lighting.
- Predictability: The rig always positions around the actual geometry, not an arbitrary origin point.
- Multi-object support: When lighting multiple objects, the combined bounding box ensures all objects are lit cohesively.
Practical Examples
- Character with origin at feet: Rig centers on torso/head height instead of ground level.
- Imported model with offset origin: Rig ignores the origin offset and centers on actual mesh.
- Multiple objects selected: Rig positions at the center of all objects' combined bounding box, creating unified lighting.
Note: This means you don't need to worry about fixing object origins before creating a rig. The addon handles positioning automatically based on actual geometry.
Understanding Override Controls
Global controls = speed. Adjust the entire rig at once for fast iteration.
Override controls = precision. Lock specific lights to exact values when you need perfect control.
When an override is enabled for a light, that light ignores the corresponding global control. This lets you have, for example, a very bright Key Light (intensity override) while dimming all other lights with Global Intensity.
Cycles vs Eevee
Lazy Lighter works identically in both render engines, but there are practical differences:
Cycles: More physically accurate light falloff, better soft shadows, realistic color blending. Use this for final renders when quality matters.
Eevee: Real-time viewport preview, faster iteration. Use this for initial setup and experimentation, then switch to Cycles for final render.
Tip: Create and adjust rigs in Eevee for speed, render in Cycles for quality.
Experimentation is Encouraged
Don't be afraid to:
- Mix light types within a rig (e.g., Spot Key + Area Fill).
- Use "wrong" color temperatures for creative effect.
- Disable lights to create variations (3-Point → 2-Point by hiding Rim).
- Push Distance Scale to extremes (0.5 for drama, 10.0 for subtlety).
- Combine presets with randomization.
The rigs are starting points. Your artistic decisions make them unique.
Changelog
Version 2.4.6 (Current Release)
- Fixed animate rig controls and per light color temperature via frame_change post handler.
Version 2.4.5
- Fixed Global Light Size and Size Override not working after changing light types.
- Fixed minor bugs and performance issues.
Version 2.4.4
- Added Light Type Randomization to Creative Randomizer with weight-based probabilities.
Version 2.4.3
- Added Light Type Override control for individual lights.
Version 2.4.2
- Rig positioning now uses geometric center of bounding box.
Version 2.4.1
- Moved preset storage to Blender's user scripts directory.
Version 2.4.0
- Fixed color temperature values in portrait and moonlight rigs
- Fixed Distance Scale. Complete rewrite for better rotation handling
- Fixed double transformation in light positioning
- Fixed critical bugs in validation and error handling
- Fixed context errors when creating rigs
- Added multi-type object support (Volume, Metaball, Point Cloud, NURBS, Curve)
- Code cleanup.
Version 2.3.2
- Creative Randomizer UX improvements and bug fixes.
Version 2.3.0
- Fixed distance scale calculation issues.
- Added Creative Randomizer system for experimental lighting.
Version 2.2.1
- Intelligent auto-scaling system based on object dimensions.
- Major UI/UX reorganization and expanded limits.
Version 2.2.0
- Bug fixes for latest rigs.
Version 2.1.1
- Added two more rigs (50 total rigs milestone).
Version 2.1.0
- UI reorganization.
- Updated Planck/Boltzmann constants.
Version 2.0.1
- Complete preset system: save, load, and delete configurations.
Version 2.0.0
- Added 37 new rigs.
- Delete Rig button with undo support.
Version 1.9.1
- Category-based organization (6 categories).
Version 1.9.0
- Removed Global/Individual mode toggle (simplified workflow).
- Removed global light color controls (color is now rig-specific identity).
- Renamed "Light Size" to "Global Light Size" for clarity.
- Color controls now always visible when light is expanded.
- Reordered per-light controls: Color first, then Intensity/Size overrides.
Version 1.8.1
- Fixed global rig controls bugs.
-
Fixed several bugs and optimized callbacks.
Version 1.8.0
-
Moved rig controls to post creation settings.
-
Improved overall user interface organization.
Version 1.7.1
-
Added rig height control for vertical positioning.
Version 1.7.0
- Added 7 new rigs.
Version 1.6.1
-
Fixed a critical bug with a circular import.
Version 1.6.0
- Code refactoring and added rigs categories.
Version 1.5.1
- Collapsible individual light controls for cleaner UI.
Version 1.5.0
- Critical bugfixes in core functionality.
Version 1.4.1
- Added per-light controls overrides.
Version 1.4.0
- Replaced Tanner Helland algorithm with Planck's Law for color temperature.
- More physically accurate color temperature calculations.
Version 1.3.1
- Fixed critical bugs in rigs code.
- Rigs code refactoring for better maintainability.
Version 1.3.0
- Added multi-object selection support.
- Rigs can now be created for multiple objects simultaneously.
Version 1.2.1
- Added Rembrandt rig.
- Reset to default values when creating a new rig.
Version 1.1.1
- Added Outdoor Sun rig and global color controls.
- Added global color controls.
- Added temperature-based color and RGB color control.
Version 1.1.0
- Added global light intensity slider.
Version 1.0.0
- Code refactoring for multi-rig approach.
- Added Golden Hour rig.
- Architectural improvements for scalability.
Version 0.9.0
- Added multi-object selection support.
- Various bugfixes and stability improvements.
Version 0.8.0
- Added ability to use different light types.
- Reset to default values when creating a new rig.
Version 0.7.0
- Enhanced rig creation system.
- Improved light controls.
Version 0.6.0
- Enhanced lighting control capabilities.
- Improved rig management system.
Version 0.5.0
- Major code refactoring.
- Improved architecture for future rig additions.
Version 0.4.0
- Additional control features for fine-tuning lighting setups.
- Enhanced property system for dynamic updates.
Version 0.3.0
- Enhanced user interface.
- Improved panel organization.
Version 0.2.0
- Improved light positioning algorithms.
- Better camera integration.
- Enhanced distance scale calculations.
Version 0.1.0
- Initial release with Classic 3-Point lighting rig.
- Camera-relative positioning and basic controls.
- Target object selection via pointer property.
- Camera reference selection for lighting angles.
Contact and Support
If you encounter issues, have questions, or want to suggest features, there are two ways to reach support:
SuperHive Market
Send a private message through the SuperHive Market platform. This is the preferred method for purchase-related questions, license inquiries, or general support.
For technical support, bug reports, or feature requests:
When Reporting Bugs
Please include the following information to help diagnose issues quickly:
- Your Blender version.
- Your operating system.
- Which rig you were using.
- What you were trying to do.
- What happened instead of the expected result.
- Steps to reproduce the issue.
💡 Note: Lazy Lighter is actively developed with free updates. Your feedback directly shapes future features and improvements!